Monday, November 29, 2010

Yulemas Bread Dough Ornaments

 
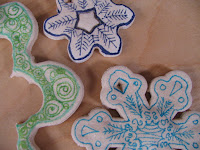
I've been having a lot of fun with this bread dough.
 
A recently bought Holiday Crafts magazine
featured an artist who did these for her project.

I instantly thought "CooL. I wanna do that"
So I did.
I used a basic recipe:
*************
1 cup Flour
1/2 cup Salt
1/2 cup Water
Additional Ingredients and TooLs
*************
Mixer with bread dough attachment
Color ~ food coloring, Tempra Paint, Acrylic Paint
Fine point or Ultra Fine Point Sharpies or suitable type pens
Varnish 
or 
Wax
or 
Clear Polyurethane Spray
Yarn, Thread, String for hanging

 Put the Flour and Salt in the mixing bowl,
turn to low/low medium speed, and slowly add the Water.
Make sure all the Flour, especially the sides and bottom are thoroughly mixed in.
Let it knead for approximately 8 - 10 minutes 
{helps the Salt dissolve more and dough more pliable} 
 
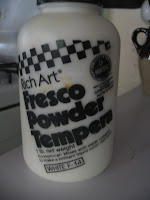
I added Powdered Tempra Paint {about 3 tbls to the water}
but it was not that noticeable.
More experimenting in the Color Depth Department needed.

I played around with cracker thin dough and it's really nice,
but VERY easily broken
{which might change when varnished/waxed}
Others were a bit thicker.
I'm playing around with all the thicknesses.
They all puffed up which I'm trying to figure out how to get rid of.

HIGHLY RECOMMEND CUTTING ON COOKIE SHEET
Moving the cut~out will very easily distort the shape

 Flour your area, roll out dough, and start making shapes.

I've been baking mine at 225* for about an hour for the Cracker Thin
or two hours for the thicker ones. 
I want to try air dry next to see how those work.
After doodling around with Designs,
I used Clear Acrylic Matte Spray to coat.
Not to happy with the results.
The Ink bled, and it sort of yellowed the dough.
I came across one post that "waxed" their Ornaments,
by melting it and brushing it on
or dipping it.....not sure about this one.
Resin dipping is also used.

Bread Dough Ornaments are':
*Traditional
*Very Inexpensive
*Kid Fun

What isn't there to like and enjoy??

Sunday, November 28, 2010

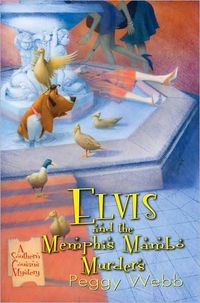
Elvis and The Memphis Mambo Murders by Peggy Webb


I discovered Peggy Webb last year during the Holidays.
Instant Fan.
and didn't even have to add water....go figure.

This is her newest addition to the Southern Cousins Mysteries
and it has kept up the good read following the first two.

Elvis {the show stopping hound dog} is glad to be "home" in Memphis
While the Cousins, Callie and Lovie are hot stepping it
to keep an eye on Callie's Momma, Ruby Nell
and her new "friend",
stay a step ahead of a Murderer
is danger from a dark eyed stranger according to Bobby the Psychic.
while trying to figure out their Love Lives.

not to mention, but will,
keeping Elvis from stealing the show from the Famous Peabody Ducks.

as if!

Lots of laughs and just simply,
a good read.

I look forward to the next few additions of
The Southern Cousins Mysteries
{and more Elvis...cause, you can never get enough of Elvis
no matter what form He's in!}

http://www.blogger.com/url

Saturday, November 27, 2010

Family Yulemas Tree Day


 oh the joy!
It was even better this year.
The Oldest Son wanted to go to the Christmas Farm this year to cut down our own trees.
I've always wanted to do that.
It couldn't have been more perfect.

The weather was gorgeous,
The air was chilly
The trees were magnificent....

 We all agree on this one!

 BaBa aka: The Chook Man, does his Chuck Norris and  cuts our tree down...

 The Womb Weebles go Sqweeeee!

It didn't take long for everyone to find their trees and gather them.
Obviously many others had the same idea.

The only thing missing was Sneaux.

It was quickly and gleefully decided that We would be here next year.

Friday, November 26, 2010

Time to Tranquilize.....

  And I'm not talking tryptophan either!

Time to Harmonize with the furniture, a snack, and a good book.

A well earned day or relaxation,
left overs,
and pjs' until afternoon.
Tomorrow brings the beginnings of Yulemas Celebratories
with Family Tree Day.

Peace, LoVe & grOOviness.

Thursday, November 25, 2010

Thank You Thanksgiving


Such a Wonderful Day.
 all is well.
Thank you.

Wednesday, November 24, 2010

Baked, a little Dazed but Never! Confused....

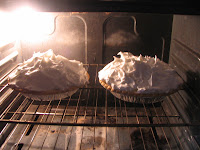
 {my beautiful meringue smashed and smooshed by a fallen picture!}

just call me Ma Baker....without the gun.
My choice of weapons
My kitchen aid mixer and my Oven.
pa pa pa POW!


Cornbread dressing
Broccoli Rice casserole
Yams
Roast, rice and gravy


One Oompa Loompa, I mean Big Ass Turkey...


Chocolate Mousse


and 6! Pies later...


even I! understand the Swedish Chef.

Monday, November 22, 2010

The Cat Who Ate Modern Danish ~ a good read

I LoVe Mysteries.


a "speaking" Cat,
loads of Mid Century Modern,
and.....wait for it......written in 1967!!!

that's right, peeps, only the best year evah!

This is the second book in the acclaimed Cat series.
Thank goodness because I only have one, to catch up.

There's Qwilleran, an ex cop now journalist newsman, with his twitching walrus mustache, that
gives Him a heads up on His Instinct and Intuition.

KoKo, the Siamese cat who is quite the astonishing detective Himself.
Plays dictionary games with Qwill, and
let's Qwill know if He's on the right track.

and lots of Mid Century Modern,
enough to make you drool on the newsprint pages of that borrowed
library book.....{shhh, the blow dryer took care of that}

I had a lot of fun reading this and going "oooh yeah, I know what that is....
so and so bligged about it"

I know traditionally during Holidays,
many people are too busy to read.
This book would be perfect for that long road trip 
{after the kids have been dosed with nyquil, um, I mean taking a nap..}

or 
when the Turkey is taking it's holiday sauna

or 
Aunt Hortence, who really does have a walrus mustache,
wants you to trim it for Her.
Hey! you know its happened!

The best thing to make the best of Holidays is to remember
that stress reduction is a must to make the day Delicious AND Delightful.
 Books are the perfect thing.

"The Cat Who...." series ~ wikipedia

Lillian Jackson Braun

Sunday, November 21, 2010

FuLL mOOn ~ November ~ Beaver Moon

My progress was rendered delightful 
by the sylvan elegance of the groves, 
cheerful meadows, 
and high distant forests, 
which in grand order presented themselves to view.
~ William Bartram


November's Full mOon is known as the Beaver mOon,
as this was the time to set the Beaver traps before freeze,
to ensure a supply of warm Wynter furs.

It may also be called this because this is also
the same time the Beaver is preparing for Wynter.


November's MoOn is also known as the Frosty Moon. 
This name comes from the Northern Autumnal Ground Frost, 
which glistens beautifully in Pale Moonlight. 
 Alchemy is the art of far and near, 
and I think Poetry is Alchemy in that way.
It's Delightful to distort size,
to see something that's tiny as though it were vast.
~ Robert Morgan


Wynter's cold descends and outward growth slows. Make this a time for inner growth. This moon signals a time to slow down. The Earth is resting. It is a time to contemplate and tie up loose ends. Dress in black, purple, blue and other dark colours to honour the sleeping earth. Use purple candles and burn full moon incense (a mixture of anise, lavender and rosemary) or mugwort or patchouli. If your observance includes a feast, then include vegetables that grow beneath the ground, such as garlic, onions, potatoes. 


http://www.farmersalmanac.com/


http://irelandsown.net/mythmagic.htm

Bead ARt
http://www.why-not-art.com/bead-journal-project.html

Frosty Moon ~ Gay Bumgarner Images

Saturday, November 20, 2010

Priscilla's Earthly Delights ~

 I ♥ Sharpies!
 
It's quite amazing I never ended up 
a Graffiti Artist considering how much 
I used to love to doodle.

These ultra fine point Sharpie markers
are like catching a Rainbow in Ink.
{although, I wouldn't recommend tasting them}
I'd use them to write in my journal 
if they didn't bleed through.
The 24 assorted pack is just da bomb.


and the lovely sparkle to this hand grenade of art 
is the 80s Glam Special Addition markers.

slam, I'm back in HigH school...
I used to have a socks and a sweatshirt
in those same colors!

snapsnapsnap! back to the post at hand...

I use my Sharpies for much of my art. 

They are great for staining
the edges of paper cutouts. 
The ultra fine point slides along
the edge smoothly and easily.
The subtle bleeding makes the images really stand out.

Apparently they are great for drawing intricate on dough ornaments, as I will be finding out in a few weeks...

I'm playing around with the Sharpies 
on Illustration Board, 
and Ink.
and of course, 
they are just Delightful! for Children of all ages 
to draw tattoos on them Selves...
hey, it's cheaper than real Ink!

Priscilla says they'll do in a pinch for eyeliner...
or X marks the spot.
{in response to my query about marking spots,
all I received is a sly smile}

The 24 pack is not terribly expensive,
and they do last quite awhile.
The prices range from $17 to $20.
If you have other Artistic personas in the house,
it would BeHooVe you,
to invest in more than one pack.
Also available in Caribbean CoLors,
and Regular CoLors.
You can order Individual Pens online.

So have a festive colorful Holiday Journey, and make sure the kids decorate the tree and not themselves.

Friday, November 19, 2010

Two SiSters Mary Thoughts for the Day ~ November

 
 "Here is the dark tree
Denuded now
of Leafage...
But a million Stars"
~ Shiki


What we're really talking about is a wonderful day
set aside on the fourth Thursday of November when no one diets.  
I mean, why else would they call it Thanksgiving?  
~Erma Bombeck 


We give thanks for unknown blessings already on their way.
  ~Author Unknown


"November's sky is chill and drear,
November's leaf is red and sear."
-   Sir Walter Scott


It is a joy to walk in the bare woods.
The moonlight is not broken by the heavy leaves.
The leaves are down, and touching the soaked earth,
Giving off the odors that partridges love."
-   Robert Bly, Solitude Late at Night in the Woods  


"How wonderful it would be if we could help 
 our children and grandchildren 
to learn Thanksgiving at an early age.
Thanksgiving opens the doors.  

It changes a child's personality.  
A child is resentful, negative—or thankful.
Thankful children want to give, they radiate happiness, they draw people."
-   Sir John Templeton


Starry Tree photo, unknown

Doris Lee's painting Thanksgiving (1935,


Self Blessing Sculpture ~ Pine Bell Art Farm
http://bellpineartfarm.com/

Agata ~ Taras Loboda

http://www.tarasloboda.cz/

Vouple Riding ~ Wassily Kandinsky
http://www.wassilykandinsky.net/painting1896-1944.php


Oil painting depicting children at play, unknown

Thursday, November 18, 2010

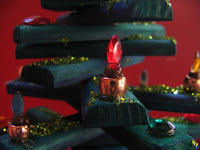
Wooden Tiered Yulemas Tree ~

 {the picture does no justice}

 I wanted to do this craft
as soon as I saw it.
Instead of visions of sugar plums,
I had visions of glass bead ornaments,
fabric flowers,
and of course
GLiTTeR!

I envisioned whole forests 
of gaily decorated Wooden trees....I digress.


This is a fairly time consuming project,
but do not let that put you off.
It's a weekend project, 
or evening project during the week.
If you have Power TooLs! 
{Power TooLs ~ a hooker's dream come true~}
it will speed it up.
I did make some adjustments and will post those at the end.

Supplies:
*************
3 10' length "screen" moulding
 1 1/4 inch diameter Wooden Ball
1/4 inch round dowel
Wooden base stand
Wooden Block OR Wooden Squares
Drill
 1/4 drill bit OR  1/4 inch flat wood bit
Wood Glue
Sanding
 JigSaw or  Miter saw
Decorative supplies
and GLiTTeR!

 Measure your Wood out. I went straight down the slat and
measured out each set one right after another.
All my 12s, then the 11s, etc.
Seems to save some wood that way.
Mark them in sequence ~ 12-1, 12-2, 12-3...

12" ~ 3
11" ~ 3
10" ~ 3
9" ~ 4
8" ~ 4
7" ~ 4
6" ~ 4
5" ~ 4
4" ~ 4
3" ~ 4
2" ~ 4

Cut the wood {I have a miter saw so I used that to quickly cut my pieces}.

Next, you'll want to drill the holes in the center of each piece.
I used  a 1/4 inch flat wood bit {looks like a bad ass Caveman arrow}
due to the fact that my 1/4 inch drill bit was dull.
Drill from the top {the domed part}.
It creates a smoother cleaner cut on top {will be rough on flat side}

At this time, drill the center hole for the base,

and drill to widen the hole in the wooden ball for the dowel to fit.

I used squares pieces instead of a block for the tree trunk.
I staggered the drilled holes so that when I stacked them,
they were "knobby", not even.

When you are finished drilling the center holes,
it's time to sand.
The wood is pretty soft, so hand sanding shouldn't be too bad.
I used my table top belt sander and the work
went by really fast.
If you use an electric sander,
be aware that it will quickly eat away the wood
and can mess your measurements up.

Lightly sand the cut edges and the drill holes.

Stain or paint.

When that is dry,
use the wood glue to attach
the 1/4 inch dowel rod
to the 1 1/4 inch wooden ball.
Let Dry.


Assemble the wooden slats to the dowel rod.
Add the wooden squares,
place wood glue on the last wooden square
and then slide the wooden base stand on.
I left mine upside down so the weight of the base stand
would glue to the wooden square.
After it dried, I used a hand saw to trim the dowel rod.

Now all that's left is to DECORATE!

I decided to go all out on this one,
seeing as it's a practice piece.
That way, I could adjust on future trees,
what I like and what I didn't.


It's also a great opportunity to use up those
arts and crafts supplies that are just hanging around.


I made Tiny Candles and
a PoPcorn and Cranberry Garland.


Wish I had enough for the whole tree.
I am leaning toward the Natural Wood look at this point,
but am wanting to try a White Tree,
covered entirely with White Decor.

Of course, there's always Halloween too!


These pictures are the original directions from


I cut my wood different than the directions.
It seemed to be wasteful cutting it per the directions in the book.
I used Wood Squares instead of a solid Wood Block


Screen Moulding