Showing posts with label Florida. Show all posts

Saturday, July 17, 2010

Priscilla's Earthly Delights

Tantalizing Treats.....mmm, yum.
The marvelous thing about Road Tripps, 
is the Stuff I've Never Seen Before.

Food Treats is usually one of those quirky things 
I like to look for when perusing the aisles of unfamiliar territories.

Zidral Mundet
************
This refreshing drink is apple flavored soda.
Surprisingly, it really is good.
I'm not a big fan of apple juice,
but the flavor is very soft.
Carbonated Apple Juice.


Sno Caps
*************
You may be wondering, what the hell I'm doing with 
a box of Sno Caps for The Treats today.
Wellll....

The stupid movie theaters here quit carrying them.
They are my go~to flavor equalizer in the theater experience.
Along with my Mr. Pibb
and the butter butter buttered PoPcorn,
Sno Caps complete the Mouthgasm.
{Priscilla schmiles}

Road Tripp Treats....

fullinated!

Wednesday, July 14, 2010

dEPSPICABLE ME


oh.
my.
gawd.

Laugh Fest.

The 1/8 Scale Model Mini Human Bits,
or, aka: Our Kids!
have been bouncing off the walls since 
they first saw the trailer for this.

The Man and I,
aka: The Parents....
wanted to go see it because Our Daughter 
totally nailed the "its so fluffy".

if we didn't know better,
We'd swear She has a secret life as a Cartoon Voice.

hey, stranger things have happened...


Family Time was enjoyed by all.

AND!
the theater had SNOW CAPS!!
or should I say~
SNEAUX CAPS.

Our theaters here quit carrying them for some reason,
and I just can't quite find the right chocolate candy
to marry with my butter, butter, buttered PoPcorn.

That made it worth the trip just for that.

sAND cANDLES

Beach Holiday.
Perfect for making Sand Candles.
So we did.
 
Supplies.
I already had the supplies at home, so it was as easy 
as packing them in a box.

Candle wax
Wick
Double boiler
Scissors
Sand
Herbs
 
We brought back a couple of buckets of sand from Le Beach.

 
Melt your wax first, after everything is set up.
I improvised a double boiler by placing a tin pie pan
over a pot of boiling water on med/low heat.
I was in no way thrilled to do it this way 
and would have preferred a better alternative,
but having worked with Wax, I made do.
 
Using The Womb Fruits beach toys, 
They made  the impressions in the sand
I cut the Wick to length and used a twisted piece of tin foil to
keep it up~right.

Make sure that the impression is deep but not touching the bottom 
of you container.
SLOWLY pour the heated wax into the mold.


After the Wax has cooled all the way through,
gently lift the candle out of the sand.
If it is still warm, let it cool completely.
Use a soft brush, like a paint brush, 
to clean it up and get rid of any loose sand.

For my Candles, I chose plain drinking glasses for the mold,
and dried herbs and fruit.
Bay leaves and Dried Orange Peel.

The instructions are the same until you add the herbs.

I would fill the mold about 1/3 of the way,
add my herbs, let cool enough to hold the herbs,
and then repeat until entire mold is filled.
If you fill the whole thing with Wax,
and then add your herbs, fruit, etc.
it will all sink to the bottom.
Especially the heavier pieces like Orange Peel.

Let cool all the way through and repeat the release process.


 I was really pleased with these!

 One problem I didn't see until after all was said and done,
was the Wobble Factor with the Sand Toy Candles.
Parts of the candle were higher than others 
resulting in Lean~age.
Haven't had a chance to find a corrections for that yet.

WARNING:
AS WITH ALL CANDLES, NEVER LEAVE BURNING UNATTENDED~
MOST ESPECIALLY THOSE WITH HERBS, FRUIT, FLOWERS, ETC.
THESE CAN TURN A ROMANTIC FLAME INTO A RAGING MASS OF FLAMING WAX.


Tuesday, July 13, 2010

pICNIC pACKINS for the bEACH


Left~ overs can be great for the Beach! Beat...
Especially if you don't have the convenience of 
staying ON the Beach.

We used the left over Roast Beef and French Bread
to make some nice, thick sandwiches.

Slice the bread in good 1" slices,
buttered a bit {not much, remember, you're on the beach},
just a little for flavor and so the sandwich won't be so dry.
 
 
Cut the Roast Beef in 1/2" slices.
I would have sliced them thicker 
if I had more Roast.
Then just wrap them nice and snug in wax paper.

Using the rest of the Chocolate Walnut Breakfast Cake,
I cut thick wedges and wrapped them also 
snug in wax paper. 

I prefer the wax paper because it is just as waterproof,
at least as much as saran wrap,
but without the inconvenience of it sticking everywhere!

The Roast Beef sandwiches were pretty filling
without all the sides added to it.

The Cake was just sweet enough to satisfy the sugar fix.
Along with drinks, couple of pieces of fruit,
you're set.

It's cheaper,
It's right there, you don't have to leave,
and The Womb Fruits LOVE! picnics.


Happy Campers make a Happy Holiday!

iCE cREAM


The kids have been wanting to make their own ice cream
We loaded up the machine, and our supplies, bought the fresh milk at the store
and made ice cream.
 
Since this is only the second time we've used the ice cream maker, 
we stuck with the prepackaged stuff.
I mixed up the ice cream and stashed it in the fridge for a few hours
per the instructions. 


After the required chilling time, it was time to put the ice cream maker to work.
Pour the ice cream mixture into the cannister,
place blade in and cover with top.

 
Layer your rock salt and ice around the cannister
to the top. Then place motor on. Start your machine.


When the ice cream is finished churning,
 remove the motor and blade,
plug hole in lid with plug,
repack with ice and rock salt to finish freeze.
 

Just follow your ice cream makers instructions.
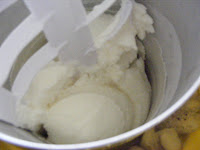
The last step didn't seem to do too much,
so I put the cannister in the freezer.
It was really good for prepackaged.
It was more like ice milk, than ice cream.
Next time, I want to try the cooked version
and a custard version.

Made for a nice simple dessert or treat.

Simple Meals ~ Salmon Patties

This is one of those meals from my childhood. 
A favorite.
A very simple meal, really nice for the last day of a Holiday HoHo Vacation.
{and even more so, if you have left overs
to make sandwiches on the road tripp home the next day}

Salmon Patties quickly became one of
The Chook Man and The Womb Fruits favorites too.
I prefer mine the next day, cold, 
made into a sandwich on fresh white bread and mayo.
Yum.


Cans of Salmon
1 Egg
Mayo
Mustard
Salt & PePPer


I used three cans and it made just enough for 5 adults
and 2 kiddos.
No left overs.

Open the Salmon and dump into a bowl.
Clean it up a bit,
by taking out the skin and round backbone bits.
It doesn't have to be perfect, just the bigger pieces.
With Salmon, I once again keep the Spices & Flavorings, simple.
It's similar to making Tuna, when you add your Seasoning.
I say be careful with your Mustard and Salt,
 because too much seems to throw off the taste of the Salmon,
and it's a bit salty in the first place.
Add your Egg, to help hold it together.
Mix well and form into patties.


I use  a non~stick pan, with no oil.
Just cook until holds together, and nice dark golden on both sides.
Add sides to make a meal,
or let cool and make sandwiches.


Score another one for the Happy Campers on Holiday!

Monday, July 12, 2010

The Big Dinner

We always try to have one The Big Dinner 
when we do road tripps.  
Sometimes, it's a Restaurant, Sometimes, it's cOOking.
Since we had a full kitchen I was in the mood to cook it.
A full on Roast Beef Dinner
I love to cook roast, its just that I hardly do.


I like Sirloin Tip roast best, 
but any beef roast will do.
As with most all of the meat I cook, 
I use very simple Spices.

For the Roast, I use:
Salt
PePPer
Garlic ~ fresh or powdered
Onion ~ diced or little strips
Water ~ about 1 cup


Tin Foil
Roasting pan or dish
*****
Puncture the Roast all over, place some cloves of Garlic in a few. Throw the Onions and rest of the Garlic into the pan, 
add the water, cover with Tin Foil.


I cook my Roast on a low temperature, 
around *250/300 degrees 
for approximately 45 mins to an hour. 
Adjust yours to the size of your roast 
and the temperature of your oven.
Take the Tin Foil off 
and turn temperature up to around *350,
finish cooking for another 30 ~ 40 minutes, 
basting a couple of times.
Test the Roast. 
I cut the center to see, and go from there. 
We like med!rare at our humble abode.


The Sides
*****
Yams ~ I just opened the can, put in pot, added a touch of salt,
a sprinkle of sugar and cooked on a low heat til heated through.

Peas ~ a couple of pieces of butter; 
cook til heated through. 


Rice ~ long grain.
Cooked for about 20 mins and then allowed 
to "steam" with towel placed on top
MAKE SURE BURNER IS OFF!!!!!


And of course, I~have~conquered~the~gravy Gravy.
This time I decided to try a canned store bought Beef broth
which worked technically, but wasn't anywhere NEAR the prize 
you get when you use  
the Broth & Drippings from the actual meat.
It was still delicious; just had to flavor it up more.


Who is that guy?

Add drinks,
Bread,
Cherry Clafouti for Dessert
and you truly have The Big Dinner!


The only sound was the clinking and tinkling
of Silverware against China.

Is there a better compliment?

Cherry Clafoutis

Cherry Clafoutis is the Cherry BomB!

A few years ago, 
I made a Cherry Clafoutis to bring to a dinner party.
The recipe just sounded Divine to me,
Custard and Cherries baked together...
um, yummm.

Since our condo had a full kitchen, 
I knew this would be the perfect time to bake it again.

After looking at many recipes, 
I stumbled upon someone using Julia Child's recipe.  

Unbeknownst to Me, 
it has become very popular since the movie came out. 
Oh well, I like Julia Child 

The recipe sounded really good 
with no diet or low anything in it.
It helped that the Cherries I were really great too!

The recipe says 
to bake a thin layer  of custard
then add the Cherries, 
and rest of the batter. 
I didn't. 
And it came out Fantabulous!


I also DID NOT PIT the CHERRIES.
The Pits are supposed to add a subtle Almond flavor,
so I left them in.
and No One broke a tooth!
Forewarned is Forearmed...

About the Baking Dish!
I used a 9 x 13 baking dish.
If you like thicker custards, use a smaller dish.
Or you may double the batch, so adjust your dish accordingly.


Cherry Clafoutis the Julia Child's Way
**************************
1 1/4 cups Milk
1/3 cup Sugar
3 Eggs
1 Tbls Vanilla
1/8 Tsp Salt
1/2 cup Flour
3 cups Cherries {I DID NOT PIT MINE}
1/3 cup Sugar

BuTTer 

 Preheat oven to *350
 Butter well! a 9 x 13 baking dish.
Place Cherries in the baking dish 
and sprinkle 1/3 cup Sugar over them.

In a blender, 
blend the Milk, other Sugar, Eggs, Vanilla, Salt, and Flour.
Pour over the Cherries, slowly, so you don't go knocking them about.
Bake for about 45 minutes
{depending on your oven}
until the Clafouti is puffed and golden brown;
and a knife, wooden stick, comes out clean when tested.
I tend to like my custards like this, more on the "dry" side.


It really is best warm.
Ours was rOOm temperature and was just a good.
You may want to serve it sprinkled with powdered sugar.


There were no leftovers.

7/12/10