Showing posts with label Holiday Crafts. Show all posts

Friday, December 18, 2015

That time of the year again!
Party Time!

Every year I try to think of new and different gifts
for Teachers, and Student's goody bags.
In addition to those, I'm the one who usually does the party crafts, 
which means a LOT of time
for creative thinking and gathering of the supplies.

As much as I love to BaKe,
I know the Teachers get overwhelmed with BaKeD goOdies, 
so I try to come up with something different.


What I started doing last year,
 was get them gift cards from one of 
our local coffee shops.
I put a $5 limit on it,
 enough for a medium to large drink,
or a small drink and a pastry.

Using my Silhouette, I cut out these pretties:


They are supposed to bend at both ends and pop open to make a small pillow,
but I don't know if it was the humidity
or the paper wasn't thick enough 
{even though I did use heavy cardstock}
they just wouldn't pop open,
so I ended up just folding them over like this:


This year's gOody Bags:


Many parents put candies or edible treats in the goOdy Bags,
which is why I go the Art route!
These kinds of crafts you can get
at Michael's and Hobby Lobby
in bulk bags 
and usually marked down.
And Don't Forget Your Coupon!
for those things that aren't.

Mini~BuBBLes and a homemade ornament
complete the ensemble.

Happiness in a plain brown paper bag!


Saturday, May 30, 2015

Priscilla's Earthly Delights

oooh where's me cuppa?
I've got some Delightful reading ahead....

My collection of vintage Christmas Craft magazines
has just grown significantly!


I love going through all these vintage magazines.
Many of the crafts are fantastic,
and many of them bring back
childhood memories!

Now to sticky note all those crafts......


.

Thursday, November 1, 2012

CRaFts from Around the CoRner


 SRSLY.

I am totally crushing on these!

Srsly?
Srsly!

I could completely see a Live YuLemas Tree
with nothing but a handful of these LoVeLies
hanging from the branches.

Add a string or two of
PoPcorn and CranBeRRy Garlands.


Light Up LoVeBiRds


Thursday, December 15, 2011

Embroidery Felt Bird ornament


This project comes from the same art magazine
as the bread dough snowflakes.
My  level of my embroidery was pretty weak,
But I wanted it so I did it....


Trace the pattern on to your felt 
{you could easily substitute
any fabric i would imagine}
Follow the stitching instructions for the embroidery.
Now, the only thing I know about embroidery
is how to thread the needle.
Oy!


I eventually finished the stitching,
 then cut the pieces out along the outline.

I did not stuff mine..I tried, but it was not a pretty sight.

I used mine as a wreath ornament for the front door.
Using a large sprig from our Yulemas tree,
I attached the Felt Bird and hung up.
I really like this project
so plan on making more of these in the future.
Rainbow would be gorgeous.


 Instructions from Holiday Crafts 2010:

Friday, December 9, 2011

GLiTTeR PineCones


Continuing with the Ornament Creations
We gathered up some pine cones
Brought them home and then
"baked" them in the oven on 225
for a couple of hours because
they were wet and needed to be dried out,
which opens them back up.


DO NOT amp up the oven temp to try and hurry up the process,
for you shall haveth burnt smoking pine cones....


 Supplies:
----------------
*Pine Cones
*Glue
*GLiTTeR
*PiPe Cleaners or other hanging material
{we used Sparkalicious PiPe Cleaners,
but CoLoRfuL Yarn would work really well, too}

Once they are dried and opened up sufficiently,
all that's left is to twist the pipe cleaner to the top,
dribble glue on all sides.
Dribble,
Don't Drobble,
or you'll have great big blobs of sporadic GLiTTeR.

Shake pine cone firmly, but gently to 
remove excess glitter.
Set up to let dry.
Once it's dry 
add randomly to your tree for 
some extra sparkly goodness in the Yulemas spirit.

{it's looking more and more like I need a new camera!}


Tuesday, December 6, 2011

GLiTTeR Acorns


 Easy craft and lots of fun.
And they look GREAT on the Tree.

Acorns
Glue
GLiTTeR
PiPe Cleaners
Green Wire
Dremel/Drill


Gathering the Acorns is a great Family Do~gether!
The bigger your acorns the better.

Once you've collected your Acorns,
separate the cap from the acorn and
make sure they are clean and dry.

First decorate the Caps; they will need time to dry.
I used Elemers Glue and Silver GLiTTeR.
Spread liberally, not drowningly, the Glue on the cap.
GLiTTeRiZe! 

You can also GLiTTeR the Acorn and leave the Cap natural
{I can't find my pics of those!}

Using a small drill bit {I used my Dremel} drill hole in Cap to insert hanger.

For the hanger, Sparkalicious PiPe Cleaners really rock,
as does the Green Wire.
Using any needle nose, flat nose, etc. pliers
to crinkle the Wire adds a really great accent.

Secure hanger with some Glue.
Place enough Glue to adhere to the Acorn and reattach the Cap.

Using a bowl of rice, or sand/dirt, beans
is great for setting the acorns up while they set up and dry.

Once the GLiTTeRed Acorns are completely dry,
hang on Tree, 
or any other surface
and Enjoy.

Sunday, December 4, 2011

Holiday Birthday Parties....


 We have three kids with birthdays
BEFORE the Holidays, 
so money can be verra tight.
No need for the Birthdays 
to be a hassle or expensive~

For the Ninja Your Heart Out Daughter, 
parties are the highlight of Her life. 
{sniffle sniffle, makes a mother proud}

party favors
I found a great way
for Her 
to still have Her Party
{without crying}
and still manage the Holidays.


 After Her party got relocated a few years ago 
from the Park to the House, 
I had to come up with a to~do quickly.
Luckily, I had some left over 
Snowman Ornament Crafts that were perfect.
It was a hit.

You can buy plenty of inexpensive crafts kits 
from any Art/Hobby/Craft Store. 
For $5, I bought a foam Ornament Kit from WallieWorld 
that had plenty plus more to go around. 
They even had enough to make some for Their Siblings.

We did the usual Pizza Run, 
but made it WAYYY more fun, 
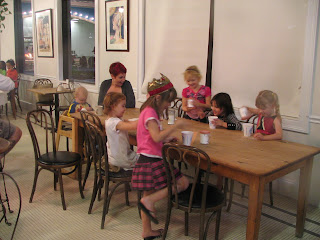
by letting them have a Night Picnic. 
Not to mention, clean up was A breeze! O'Lo! 

  
Since I made two sets of
baking and caking already,
We opted for a night with
Beignet Fingers and Hot Cocoa...
so convenient for little ones hands.


For Party Favors, 
we did PaPer Whites
instead of those 
little grab bags.
Places like Home Depot have a bag of 
PaPer White Bulbs 6 for $4/approx.
I needed two bags.
I caught mine on sale 50% off!

A small bag 
of Potting Soil, 
Medium Plastic Cups, 
and Sweet Little Lady, 
you've got Party Favors! 
THEY LOVED IT!.


That right there, pEEps...
that's how you become a Holiday HoHo Queen~

Sunday, November 27, 2011

Construction PaPer Chain


I really wanted to
keep it simple this year.
If I can avoid 
dragging all the stuff
from the attic out, 
hey, Gold Stars for me!


Here's a good old fashioned, from my childhood
and beyond, craft that was
* Easy
  * Cheap
* Fun

This is the first time my Wombers have done this craft.
And they had so much fun. 


Supplies:
----------
*Construction PaPer
*X~acto Knife or Razor
*Ruler {I used Metal so the blade wouldn't
           catch on the Wood}
*Glue {We used a Glue Gun}


I used an old cookie sheet 
for cutting the strips.
Line the paper 
up in a corner,
set your Ruler,
Slice.

I cut varied widths 
to make it 
more interesting.

They had a blast,
and we've gotten lots of 
compliments on the Garland.


sigh. I miss Kindergarten!


Tuesday, October 25, 2011

Silhouette brOoches


*Foam sheet
*Scissors
*Pin Backs
*Glue


Using silhouette clip art as a guide,
I sketched out some
simple Bat shapes
on Foam Sheets.

Since these are small sized, 
I used my Embroidery Scissors to Snip and Cut.
At first I thought Tie Back/Pins would be great,
but they didn't hold the Foam well;
the Bats kept turning upside down!
That's a whole other different brooch.

Go with the long pin Brooch backs; they will hold the Bats firmly.

These are easy peasy;
switch up with Witches, Cats, and Other~Worldly Figures.
Zombie, anyone?

Friday, January 21, 2011

Resinated Animal Cracker Ornaments

This is another one of those projects 
that I stumbled upon from back in the 80s.
Only that project was using
clear fingernail polish to coat the cookies.
Did NOT work!


But I've always loved the idea of this.
and it's easy.
looks good
and can make a great gift too.

Supplies
********
Animal crackers
Wire or pre~made hooks
Elmer's Glue
Resin
Wax paper
Wire cutter
Pliers
Wooden stick, I used a chopstick,
or other suitable object to make a hanging rack
Disposable spoon
Extra Wire for dipper hooks

I like the idea of making my own hooks.
I choose a burgundy/purplish wire.
20 gauge.
Cut a piece of wire, then use the
pliers/needle nose to shape it.
You can see I did a square for the
attached part; loop for the hanging part.


Using your chopstick or other object construct your hanging/drying rack.
I have a double clip "third hand" that I placed the chopstick on. 
Anything will work as long as you make sure the rod doesn't roll.
Place drying rack on wax paper {or other suitable stuff like foil or glass} for your drip.

After creating your hOOks, use the Elmer's glue to attach them.
Let glue dry completely. If it comes off, redo it.

Quickly make some S shaped dipper hooks
{the metal bit that is on the loop end}
Attach one to each loop.

Mix up your resin, Make sure its in a cup deep enough to dip the cookie crackers.

I used a bit of wire in the hook to dip the cookies in the resin. 
Have a disposable spoon handy to pour the resin around the hook 
and coat the cookie thoroughly. 
TRY NOT TO GET RESIN ON HOOK LOOP!
Then you'll be stuck with your dipper wire attached to you hanging hook. 
Let it runoff for a handful of seconds and place on hanging rack.
Let dry for a day or two, then lather, rinse, repeat.  
Twice more.

I triple coated these babies. 
So it can take up to a week to get these done. 
You want to make sure that they are
completely hardened and dried 
so they won't stick to anything. 
sometimes they do anyway.
If so, Let them out in the open for a bit
and they should harden back up.

I also wanted to see how they would look
with the Priscilla Effect.
GLiTTeRized.
I used this monkey as my guinea pig since I screwed up the hook.
Honestly, I'm not sure. I will have to play around some more with it.

When they are completely done, 
you should be able to carefully repackage them in their original box,
or maybe create something out of an egg carton.


Thursday, December 23, 2010

Wooden Tiered Tree the Third


This is by FAR,
my favorite of the Three Trees, 
that I have made.


It's just pure, simple, clean.


A simple, expressive Garland for decor.
 
{next time, I will make it a wee bit longer}


The only bit of color
is the felt glued to the bottom.
This shade of Blue, 
is just so expressive of Wynter.
The naturalness of the Wood,
really makes the CoLoR glow.


I have to say, that I have really enjoyed this project.
Every time I do a new Tree, I get ideas for 5 more....
There are so many alternatives to this project, 
it will make you dizzy!