Showing posts with label Crafts. Show all posts

Saturday, May 30, 2015

Priscilla's Earthly Delights

oooh where's me cuppa?
I've got some Delightful reading ahead....

My collection of vintage Christmas Craft magazines
has just grown significantly!


I love going through all these vintage magazines.
Many of the crafts are fantastic,
and many of them bring back
childhood memories!

Now to sticky note all those crafts......


.

Tuesday, October 1, 2013

CraFts from Around the Corner

 I LOVE both of these ideas!
I would definitely use a Black Light spotlight 
for the Dresses.
Then, I would hang a few from the Oak Tree
so they swirl and whirl...
The cool thing is you can make any shape.
oooh, a Cat.


These should be a must~do for any kiddo 
doing Halloween Celebratories.
Easy and fun.
I better start saving my cardboard rolls right now....

Crafts like these send me right back 
to Childhood.


Friday, November 2, 2012

Tools I'd Like to have....


 I LoVe to GLass Etch
and create PaPer Jewelry.

Both create a need for 
quality
repetitive 
workings.

This machine seems to right up that alley.
Especially for the
 glass etch stencils.

The possibilities are endless.

Thursday, November 1, 2012

CRaFts from Around the CoRner


 SRSLY.

I am totally crushing on these!

Srsly?
Srsly!

I could completely see a Live YuLemas Tree
with nothing but a handful of these LoVeLies
hanging from the branches.

Add a string or two of
PoPcorn and CranBeRRy Garlands.


Light Up LoVeBiRds


Sunday, August 26, 2012

ReCoLLeCTioNs GLiTTeR


I am in LoVe with these GLiTTeRs!
These GLiTTeRs are Irish Crack,
so much FuN are They.
It's the TeXTuRes that are really Rockin.

and a briLLiant assortment of CoLoRs.
The Tinsel GLiTTeR is my second faVe.
It's got Priscilla written alll over it
{Priscilla says: Got Body Glue?}


These next two are regular extra fine GLiTTeR,
but I bought them for the CoLoR.
The Raspberry is a bit darker 
than in the picture,
and I have some special PaPer 
waiting just for this one.


The Frost 
is one I've been having a LOT of Fun with.
The GLiTTeR lightens up 
quite a bit once it's been glued.
It's a Yulemas pale shiMMer, 
that you can darken by adding
more layers.


THIS is the one that gets my 
punk rock, rock and roll Art Heart goin.
The Microbeads!


These are a bit tricky.
I haven't quite found the best
way to use them.
When you pour the beads on, 
it lumps and can get very uneven.
I did get better results 
by using the sprinkle side,
but when I added 
the second/third coat,
it glumped up. 
No worries, 
it's one product I don't mind
having to keep trying out over and over!


These are a more than welcome
addition to my Supply Cabinet.
So far, I've gotten really nice results,
just as nice as Martha F'n Stewart's
{cause Martha is da bOmb!}.
and those square jars are so grOoVy. 
The jars are large, with double openings,
one for pouring,
one for sprinkles.
Replacing GLiTTeR back in jars 
is so much easier also.

I can't wait to add more selections
to my collection.
Especially the textured GLiTTeRs.

DON'T FORGET~
Check your store for on~line coupons.
{I bought these from Michaels.}
I thought the Hob Lob carried them,
but I can no longer find them. 

Friday, June 1, 2012

CRaFts from Around the CoRner...


It's that time of the year again!
Robots!
Let's get this party started....

with a whole bevy of Robots,
and a LuCKy 13 at that.


Thursday, March 1, 2012

CRaFts from Around the CoRner...


 OMG!
These shrinky dink earrings are so Rad!

I really need to get some shrink plastic
and replenish my fine point Sharpies!

This would also be a great project for
The Kiddos to get started on Yulemas presents.


Wednesday, February 1, 2012

CRaFts from Around the CoRner...


 I LOVE CoFFee Cans! {along with TomaTo Sauce cans}
I don't hoard them,  but I sure use them.
Here's some really rad things to do with those big ass Coffee Cans.

I especially LoVe the Hanging Light project.
I would make some with Single cans also.
These would be perfect for my Studio.

so here's Curbly, with our 'round the corner craft...


One another great project are Can Stilts for the kids.

Sunday, October 9, 2011

Priscilla's Earthly Delights

Creative Hands 

I LoVe boOks!
More than that,
I love Arts & Crafts books...
Even better,
a WHOLE set!

and that's what I got.
My library used to have this set,
but no longer.

After going to check out one of the Series,
and discovering this unfortunate truth,
I googled, etsy~ied, ebayed,
and found a set that wasn't to terribly expensive.

I'm really looking forward to a lot of these projects,
especially the Knitting and Crocheting
{Priscilla says: Not the Poncho, Honey}


Thursday, September 15, 2011

Velvet Flocking


What the Flock?
and I arrrn't talking Seagulls.

I was verra excited to try this out
for some vintage~inspired Yulemas ornaments

Velvet Flocking.

Expensive as hell, $17,
but with your 40% off coupon at the hob lob 
{the Chook Man~hubs actually put the coupon on my phone desktop thingy}
I figured it was worth it.

So far, I'm not having much luck on the Ornaments.
The flocking is disappearing when it dries.
I'm not sure what the problem is,
but am working on it.


I'm deciding more that the Flock 
would be nicer on my Yulemas cards than the Ornaments
I'll post a post on the cards soon.

I'll also know more about if it's really worth it
to spend the money after trying it on a couple more projects.

Sunday, March 27, 2011

Seashell Trinket Treasure tray

I had these left over shell bowls
from the ball
not to mention,
but will,
all those damn
Mardi Gras beads!


What the hell am I supposed to do with them?
Then I decided, Hey, why not make a Trinkets Tray.
Supplies:
*************
Resin
Decorative plastic Sea Shell
Plastic Beads, assorted;
Large White Beads for the "pearl", cut 1 from strand
Decorative Rocks, plastic or glass
Star beads/sequins/charms
GLiTTeR
Glue


First thing to do is fill the bottom.
Toss your Decorative Rocks in,
and mix up your Resin.

Once the Resin is ready,
pour over the rocks to just cover them.
I had a few bumps where the resin didn't 
quite cover and it was fine.
Not enough ~ just mix a bit more
Too much ~ make up a few pendants
I also poured a bit of resin the seam 
of the two Shells to secure it.
Sprinkle just a wee bit of GLiTTer in.


Depending on what type resin you use,
around 10 to 15 minutes,
check the set.
Remember the Prell commercial where they put the pearl in it?
you want that kind of thick.
Set your Stars and your Pearl in the resin.
Sprinkle a wee bit more GLiTTer on the resin.

Once the Resin has completely cured/dried,
start gluing your Decorative Beads for trim.
I used one strand of Pink for the upper Shell
and cut three strands of Gold for the seam.


ah, Cher', you've got a treasure!

Friday, February 11, 2011

Easy Kids Valentine's Cards

 School Valentine's isn't what is was when I was a kid.
I remember going all out at school, with crafts, and a party.  
Elaborate boxes decorated to receive cards.
Now its, buy box, rip apart, put generic name signing {From: womb weeble}, bring to school.

I just made some simple ones for my daughter to bring to school.


Using card stock, 
a butterfly cutter, 
and sharpie pen,
I snapped them out.


Decide what size you want your card to be. This is pre~K so we went small.

Fold in half, crease well.

Stamp cut the butterfly on one side.


Using your sharpie, draw Hearts in the butterfly window.
Sign on the inside.
Tiniest bit of tape to hold together..

I stacked them all neatly and wrapped 
a strip of card stock paper around it to hold them together.
Viola.
Took less than an hour 


Tuesday, February 8, 2011

February ~ Aquarius the Water Bearer

 water hookah under night sky...Age of Aquarius

  Aquarius

February Stars ~ Foo Fighters


Air clouds or Water bubbles,
this ring is
phenomenally CooL 


This LoVeLy Mermaid has some sass.
She has her eye on yer Treasures!


I freakin LOVE Astrology.
Add one Bubble bath, 
in a pink tile bathroom;
Cocktail,
and Music.....


 Aquarius ~ Cal Tjader

What do the Stars have to say about You?


Sweet Blue Velvet Mary Janes...


Vintage Heart Charms


 LoVe's Theme
~ LoVe Unlimited Orchestra


This appeals to the Gorey in me....


Sputnik Ring ~ JoWalker68
http://www.etsy.com/listing/38611554/sputnik-ring

Mermaid figurine ~ BeeJayKay
http://www.etsy.com/listing/67641740/mermaid-30s-40-porcelain-aquarium-figure

Vintage Horoscope Mag ~ VintageNickNax
http://www.etsy.com/listing/66324813/horoscope-astrology-magazine-1950s

Aquarius screenprint ~ Horsedrawncarriage
http://www.etsy.com/listing/60610045/aquarius-screenprint-limited-ed

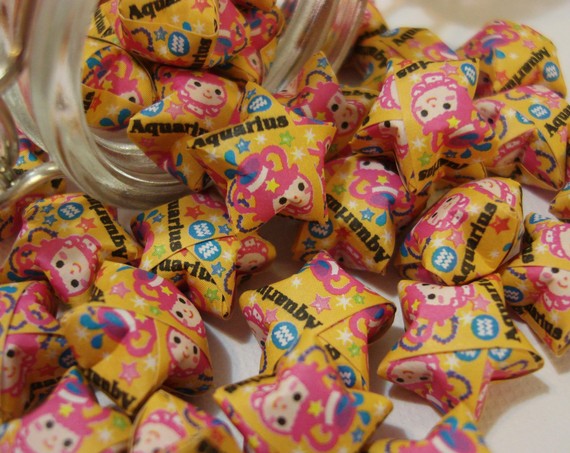
Origami Aquarius Stars ~ Love2gifts
http://www.etsy.com/listing/67030346/aquarius-zodiac-sign-origami-stars

Wednesday, December 8, 2010

Silver

 nuff said.

sigh, I will again, one day, have The Mustang.

but for now:
let's satisfy that urge with these....
Holiday HoHo's
{like the cake treat but without the calories}

 Silver is just Wynter.
I've warmed to Gold/Red
but it's still Silver for Me.

Many Parties and Get~togethers,
Socializing and Sassiness,
 Fairy Lights...


 How Cheery is this, Darling?
 with rings on Her fingers...
Sparkle at your finger tips,
the perfect partner to those Fairy Lights.

I love this piece of art work...
it's beautiful
and soothing.
I have a thing for Silver Trees~


The Perfect Dress for a walk through
those Silver Trees...Magical.
This one just brings Me straight back to High School.
Wynters were just the best.
We felt so grown up, having parties, going to the clubs...

 Because you can't have too much Hot Beverages
for the Holidays...


moving on....
Stressed?
need a good Laugh?

we LOVE Dinosaurs at our house.
Me? since Land of the Lost, BayBee!
Here's a CooL t~shirt for those down for relaxation days..
to grab a bite with Friends at the Cafe,
with Jeans,
for a LoVeLy afternoon 
of PaPerbacks, Pastries, and Tea
 Dinosaurs Rock!
{just keep ahead}

Here is my pick for my beloved Mary Janes...
My first thought when I say these was "ooh, Witchy...
double shazam, Wynter Witchy".
yep, no argument there, or here. 
LoVe them.


 Of course, to polish off any Holiday outfit,
a beautiful coat and Holiday Purse.


along with Metallic eyeliner
and frosty pink lipstick...
oh Cher' BeBe~


and to end on this Bright and Cheery note,
this embroidery.


Snow globe Ring
Pink and Red Deer in Silver Forest ~ Michelle Brunner
http://www.etsy.com/listing/18322061/pink-and-red-deer-in-silver-forest


Vintage Silver Dress ~ Coral Vintage
http://www.etsy.com/listing/58080012/vintage-silver-moonlight-dancing-dress


Vintage 80s Sweater Dress ~ Decadence Past
Coffee Carafe ~ Wilshepherd
Silver Mary Janes ~ Onceinabluemoonvint
Silver FauxFur Coat ~ More to Adore Vintage 
Silver Clutch ~ Vintage Circa Style 
http://www.etsy.com/listing/61775861/elegant-1960s-vintage-silver-clutch


Silver Bird Love embroidery ~ Colleenbunny 
http://www.etsy.com/listing/61673182/silver-bird-love

Thursday, November 18, 2010

Wooden Tiered Yulemas Tree ~

 {the picture does no justice}

 I wanted to do this craft
as soon as I saw it.
Instead of visions of sugar plums,
I had visions of glass bead ornaments,
fabric flowers,
and of course
GLiTTeR!

I envisioned whole forests 
of gaily decorated Wooden trees....I digress.


This is a fairly time consuming project,
but do not let that put you off.
It's a weekend project, 
or evening project during the week.
If you have Power TooLs! 
{Power TooLs ~ a hooker's dream come true~}
it will speed it up.
I did make some adjustments and will post those at the end.

Supplies:
*************
3 10' length "screen" moulding
 1 1/4 inch diameter Wooden Ball
1/4 inch round dowel
Wooden base stand
Wooden Block OR Wooden Squares
Drill
 1/4 drill bit OR  1/4 inch flat wood bit
Wood Glue
Sanding
 JigSaw or  Miter saw
Decorative supplies
and GLiTTeR!

 Measure your Wood out. I went straight down the slat and
measured out each set one right after another.
All my 12s, then the 11s, etc.
Seems to save some wood that way.
Mark them in sequence ~ 12-1, 12-2, 12-3...

12" ~ 3
11" ~ 3
10" ~ 3
9" ~ 4
8" ~ 4
7" ~ 4
6" ~ 4
5" ~ 4
4" ~ 4
3" ~ 4
2" ~ 4

Cut the wood {I have a miter saw so I used that to quickly cut my pieces}.

Next, you'll want to drill the holes in the center of each piece.
I used  a 1/4 inch flat wood bit {looks like a bad ass Caveman arrow}
due to the fact that my 1/4 inch drill bit was dull.
Drill from the top {the domed part}.
It creates a smoother cleaner cut on top {will be rough on flat side}

At this time, drill the center hole for the base,

and drill to widen the hole in the wooden ball for the dowel to fit.

I used squares pieces instead of a block for the tree trunk.
I staggered the drilled holes so that when I stacked them,
they were "knobby", not even.

When you are finished drilling the center holes,
it's time to sand.
The wood is pretty soft, so hand sanding shouldn't be too bad.
I used my table top belt sander and the work
went by really fast.
If you use an electric sander,
be aware that it will quickly eat away the wood
and can mess your measurements up.

Lightly sand the cut edges and the drill holes.

Stain or paint.

When that is dry,
use the wood glue to attach
the 1/4 inch dowel rod
to the 1 1/4 inch wooden ball.
Let Dry.


Assemble the wooden slats to the dowel rod.
Add the wooden squares,
place wood glue on the last wooden square
and then slide the wooden base stand on.
I left mine upside down so the weight of the base stand
would glue to the wooden square.
After it dried, I used a hand saw to trim the dowel rod.

Now all that's left is to DECORATE!

I decided to go all out on this one,
seeing as it's a practice piece.
That way, I could adjust on future trees,
what I like and what I didn't.


It's also a great opportunity to use up those
arts and crafts supplies that are just hanging around.


I made Tiny Candles and
a PoPcorn and Cranberry Garland.


Wish I had enough for the whole tree.
I am leaning toward the Natural Wood look at this point,
but am wanting to try a White Tree,
covered entirely with White Decor.

Of course, there's always Halloween too!


These pictures are the original directions from


I cut my wood different than the directions.
It seemed to be wasteful cutting it per the directions in the book.
I used Wood Squares instead of a solid Wood Block


Screen Moulding