Showing posts with label Holiday Decorations. Show all posts

Saturday, March 10, 2012

PrisciLLa's EarThLy DeLights

 These Scandinavian/Dutch tablecloths,
are just so FeSTiVe!
{Priscilla says: Happy Festivus!}

What I like most, is the simplicity of the shapes,
and the way the CoLoR is used to make them shine.


 The Pine needle Wreath is what really sold it for me.
This one is just so cheery. I have the perfect little side table to use it on.
The hard part is going to be which Decor to use with it:
Tiny Yulemas Trees?
Plastic Santa?
Velvet Fruit?

We'll just have to wait and see!

Saturday, February 11, 2012

PrisciLLa's EarThLy DeLights

 I fell in LoVe with these cardboard GLiTTeR Bird ornaments
{Priscilla says: Everything is better with GLiTTeR, Sugar!
Who doesn't want to shine??}

This one is extra special ~ the head pops off
and you can stash a treat inside!


I'd like to get a Pink One, and a Blue One to compete a personal set.


If this Byrd could talk, oh the stories it might tell....


TinselandTrinkets

Tuesday, November 15, 2011

Deer Revamp for Fall


 Remember that Clark Griswold Big Ass Haul of  Decor 
we were given by my mother in law a few years ago?
She had these reindeer that were no longer mechanical but lovely just the same.
Lightbulb.
Revamp them and even use them for different holidays!
So, I did.

Saturday, May 21, 2011

Priscilla's Earthly Delights

 Priscilla says "HoHoHo"

Meet Plastic Santa.
He is now an official resident in Kelly's Frontier.

I think he will look grand next to the Yulemas tree this year~


Thursday, December 23, 2010

Wooden Tiered Tree the Third


This is by FAR,
my favorite of the Three Trees, 
that I have made.


It's just pure, simple, clean.


A simple, expressive Garland for decor.
 
{next time, I will make it a wee bit longer}


The only bit of color
is the felt glued to the bottom.
This shade of Blue, 
is just so expressive of Wynter.
The naturalness of the Wood,
really makes the CoLoR glow.


I have to say, that I have really enjoyed this project.
Every time I do a new Tree, I get ideas for 5 more....
There are so many alternatives to this project, 
it will make you dizzy!

Sunday, December 5, 2010

Revamping Ornaments, Vintage or Otherwise


 When I think of childhood holiday ornaments,
I can't think of one where GLiTTeR isn't part of it.
So, Sparkle Addiction is a childhood manifestation.
My poor little Angels were looking a bit wonky,
so I jassed them Up.

How can a Cherub be a proper Cherub without
the proper amount of GLiTTeR??

The only dilemma is,
how much,
who much,
that much.

I used Mod Podge and brushed it on
where ever I wanted to renew the Sparkle.

One I covered just the Fancy parts.
Two was covered more all over than not.
Three was just whip GLiTTeRed: 
mod podge, whip of glitter to fall where it may, minimally.

Let dry.


Now there's a proper Cherub.


Priscilla says,  mmm~hmmm.


Monday, November 29, 2010

Yulemas Bread Dough Ornaments

 
I've been having a lot of fun with this bread dough.
 
A recently bought Holiday Crafts magazine
featured an artist who did these for her project.

I instantly thought "CooL. I wanna do that"
So I did.
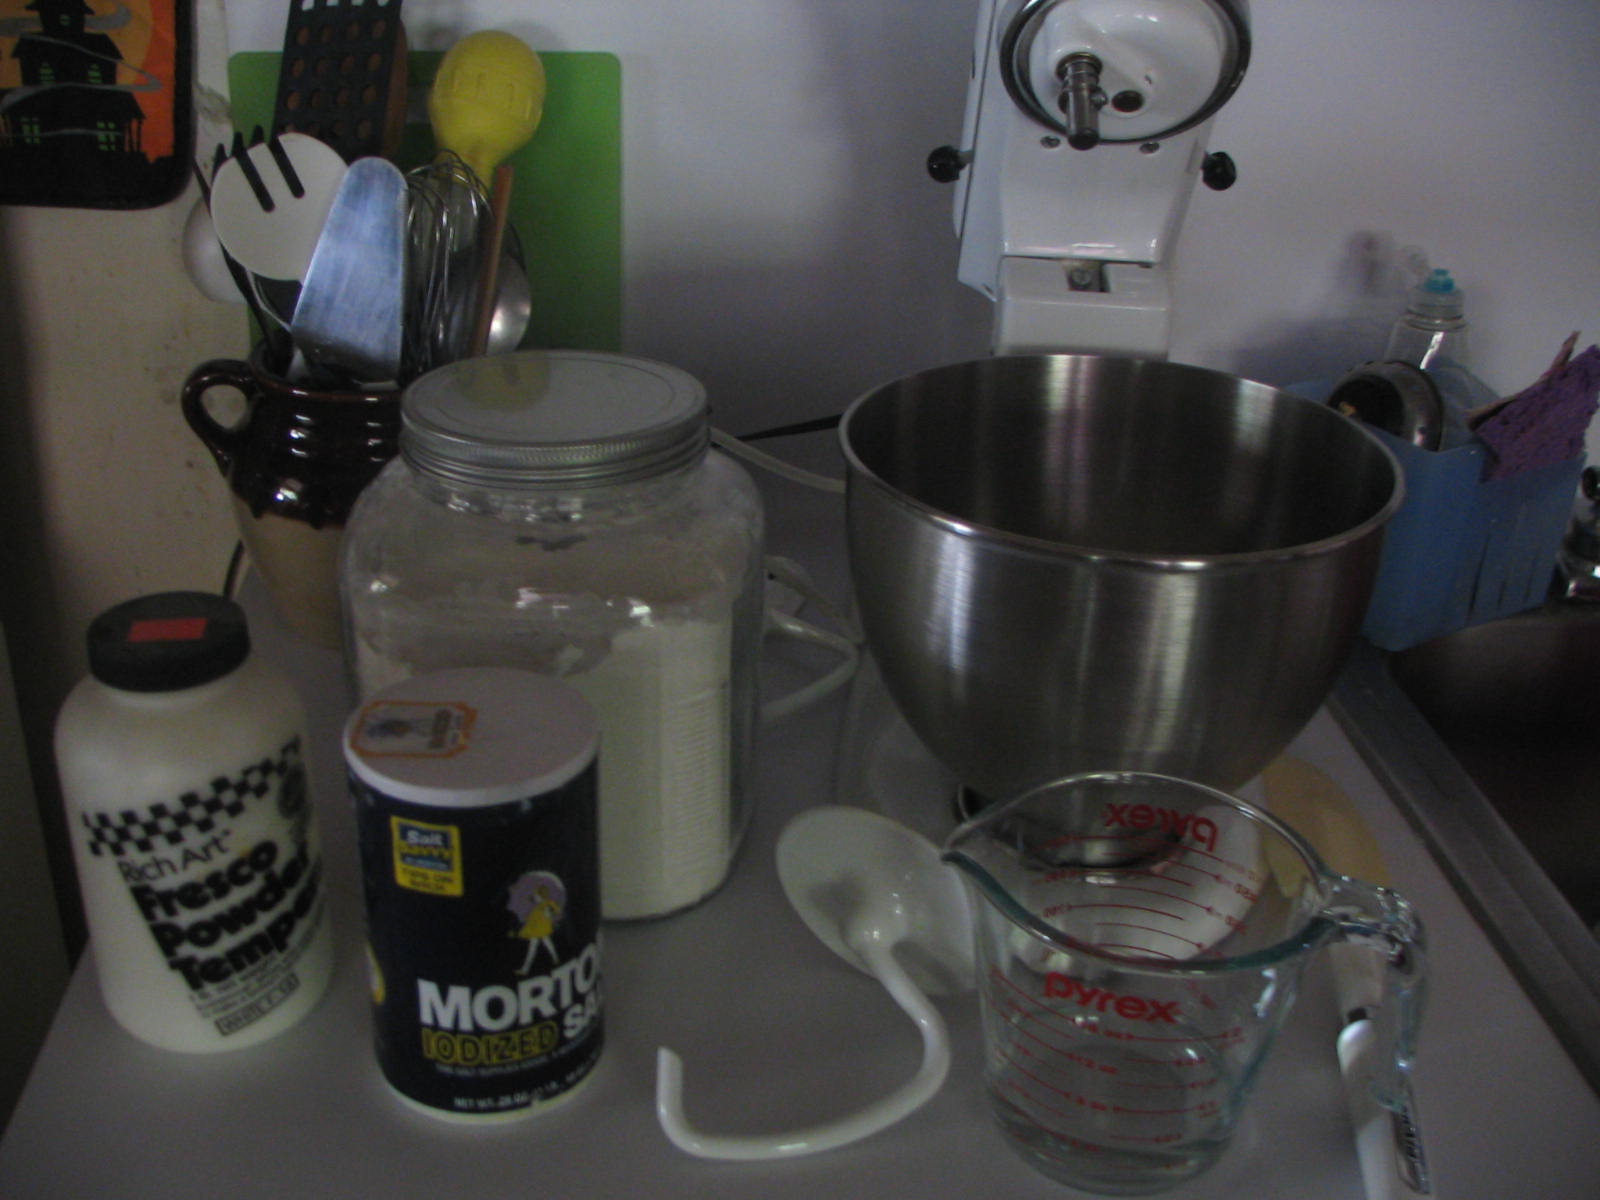
I used a basic recipe:
*************
1 cup Flour
1/2 cup Salt
1/2 cup Water
Additional Ingredients and TooLs
*************
Mixer with bread dough attachment
Color ~ food coloring, Tempra Paint, Acrylic Paint
Fine point or Ultra Fine Point Sharpies or suitable type pens
Varnish 
or 
Wax
or 
Clear Polyurethane Spray
Yarn, Thread, String for hanging

 Put the Flour and Salt in the mixing bowl,
turn to low/low medium speed, and slowly add the Water.
Make sure all the Flour, especially the sides and bottom are thoroughly mixed in.
Let it knead for approximately 8 - 10 minutes 
{helps the Salt dissolve more and dough more pliable} 
 
I added Powdered Tempra Paint {about 3 tbls to the water}
but it was not that noticeable.
More experimenting in the Color Depth Department needed.

I played around with cracker thin dough and it's really nice,
but VERY easily broken
{which might change when varnished/waxed}
Others were a bit thicker.
I'm playing around with all the thicknesses.
They all puffed up which I'm trying to figure out how to get rid of.

HIGHLY RECOMMEND CUTTING ON COOKIE SHEET
Moving the cut~out will very easily distort the shape

 Flour your area, roll out dough, and start making shapes.

I've been baking mine at 225* for about an hour for the Cracker Thin
or two hours for the thicker ones. 
I want to try air dry next to see how those work.
After doodling around with Designs,
I used Clear Acrylic Matte Spray to coat.
Not to happy with the results.
The Ink bled, and it sort of yellowed the dough.
I came across one post that "waxed" their Ornaments,
by melting it and brushing it on
or dipping it.....not sure about this one.
Resin dipping is also used.

Bread Dough Ornaments are':
*Traditional
*Very Inexpensive
*Kid Fun

What isn't there to like and enjoy??

Tuesday, October 26, 2010

Glammed Up Halloween Decor


 I still LoVe these simple wooden decorations. 
They are SO versatile!
VERSATILE! 
which means, 
you probably won't run out of ways to decorate them.

One big checkmark in their favor is they are very inexpensive, and very abundant 
in art craft stores.
They are perfect for The Womb Weebles. 


I've seen many people over the years
who do Halloween Trees, 
and these would be a FanTasTic way to dress it up.

I had a couple of the pumpkins left from the Classroom Project last year {alas, so far, no projects this year.}
The charming Bat has been in my possession a few years.

Let's play dress up.


things needed for Object de Halloween Art
*************
 Wooden blanks in Various Shapes
GLiTTeR! a given!}
Glue of your choice, I used trusty Elemers
Colored Ink {or paint}
Soft paint brush
String for hanging


Start by staining or painting your Wooden Shape. 
Remember that these type wooden pieces 
will really soak up the liquid, 
so work quickly to spread the Color.  
The wood will damp, so to dry mine 
I set it under my work bench light.

Once the wood is dry, break open the GLiTTeR!
I used the Glitter on the PumPkin 
to imitate the grroves and vines, 
and just followed the curves on the Bat as you can see. 
Try mixing shades of GLiTTeR for a deeper effect.


Tie string on after dry, and Le Glammed Up Decor is good to go. 
Sparkle, Sparkle, 

Monday, November 30, 2009

Bringing out the Holiday Yard Bling


Remember that LoveLy unexpected stash of yard bling my mother in law sent us?
Its time to show it off! ")
So We mixed it up with Our stuff, gave a lot of it away to the older kids, and STILL didn't put everything out....but I bet We make Griswold Gold Status next year.

Ours: Although these are not the actual vintage pieces I had as a Child,
They are great replicas. I was bonkers when I first saw them years ago.
These are must haves every year at our homestead.


 New pieces but quickly favorites. I'm really digging that White Tree, the bulbs are those big fat round bulbs and they look like ripe pieces of candy hanging there. SugarPlum Girl instantly befriended the Snowman; not surprising since She's in Love with Frosty and has already watched the show a multitude of times.


 Old and new again.


 There was supposed to be this HUGE 6 foot holographic light ups Reindeer~Santa-in-his-sleigh~thing that was going to go up on the roof, but it won't quit raining. Maybe some time before Yulemas..

Decorating the Tree.....Part 2

Today we Decked the Tree,
The Halls,
The kids..

And for the first time Ever! 
The Sugar Plums did it themselves...
sniFFLe, I've waited a long time for that.

It's always exciting to open up the Holiday Tree Glam
oohing and aahing,
remembering,
looking for those damn hooks!


Oh but the eFFort is Worth it. 


 The Sugar Plums having Fun.


Naturally, the Vintage pieces make it feel like LoVe.
This is a crocheted Tree skirt that My grandmother made for Me, I believe in the late 80s? Yep, that long ago. I treat it like a delicate piece of Lace. 


This exquisite, yuMMy piece is from My childhood.
Santa.
Its so beautiful hanging by the PoPcornCranbeRRy Garland. 
All I need is a little Dean Martin crooning in the background and I've got a serious Yulemas Trio to put ANYone in the Holiday mOOd.
Handle with care!


 Here are some more Vintage pieces from My childhood. And in case you've forgotten, I was born in 1967! greatest year there ever was....
{just my humble onion}
Notice the fantastic GLiTTeR designs?? 
That is my favorite part about these Vintage pieces,
{gold ball, green ball}
That ceramic rocking horse behind the green ball was a present from a middle school best friend. I recently connected with Her again, and She was thrilled that I still not only have it, but use it.


Say what you will, but a Tree just doesn't Rock until is flittering with Silver Tinsel.


Here it is, all put together.
An attractive, charming blend of LoVe.


{this is just a picture of what my tree looks like from underneath}
Don't ask, lol